To draw a star, start by drawing a small upside-down “V” shape. Then, draw a straight line downward from the middle of the “V” shape.
Finally, draw another straight line upward from the end of the first line to form the top point of the star. Drawing a star can be a fun and easy activity. Whether you’re creating a star for a craft project or just for fun, the process is simple.
All you need is a pencil and paper, and you’re ready to begin. We’ll show you step-by-step how to draw a star in just a few easy steps. With a little practice, you’ll be able to draw stars of all shapes and sizes in no time.
Introduction To Dragon Drawing
Learn how to draw a dragon with these simple steps. Start by sketching the dragon’s basic shape and then add details like scales and wings. Practice shading to bring your dragon drawing to life.
Capturing The Mythical Essence
Drawing a dragon can be a fun and rewarding experience. However, capturing the mythical essence of these creatures can be challenging. To effectively draw a dragon, it’s essential to understand the basic characteristics that make a dragon unique. These include sharp claws, wings, scales, and a long tail. In this post, we’ll provide a step-by-step guide on how to draw a dragon while capturing its mythical essence.
Materials Needed For Dragon Art
Before diving into the drawing process, you’ll need to gather the necessary materials. These include pencils, erasers, paper, and coloring tools. It’s recommended to use high-quality materials to ensure that your dragon drawing is of high quality. You may also consider using a drawing tablet or computer software if you prefer digital art. When it comes to pencils, we recommend using a set of graphite pencils ranging from 2H to 8B. This will allow you to create a range of lines from light to dark. An eraser is also essential to correct any mistakes during the drawing process. For paper, a high-quality sketchpad is recommended, as it will prevent smudging and ensure that your drawing is of high quality.
Steps To Draw A Dragon
Now that you have all the necessary materials, let’s dive into the steps to draw a dragon: 1. Start by sketching the basic shape of the dragon. Use light lines to draw the head, body, and tail. 2. Add details to the dragon’s head, such as the eyes, nose, and mouth. 3. Draw the dragon’s wings, making sure to include the veins and texture. 4. Sketch the dragon’s legs and feet. Don’t forget to add the sharp claws! 5. Add scales to the dragon’s body. You can use a reference image to ensure that the scales are in the right place. 6. Use darker lines to add shading to the dragon’s body, creating depth and dimension. 7. Finally, color your dragon using coloring tools of your choice. You can be as creative as you like! Drawing a dragon can be a fun and rewarding experience, especially when you capture the mythical essence of these creatures. By following the steps outlined above and using high-quality materials, you can create a dragon drawing that is truly unique and impressive. So, grab your pencils and paper, and let’s get started!
Credit: www.youtube.com
Finding Your Inspiration
When it comes to drawing a dragon, finding your inspiration is key. A dragon is a mythical creature with countless interpretations across various cultures. To create a captivating dragon drawing, you need to delve into the world of dragon lore and explore different dragon types. Let’s take a closer look at how you can find your inspiration for drawing a dragon.
Studying Dragon Lore
Studying dragon lore is an essential step in understanding the symbolism and characteristics associated with these majestic creatures. By immersing yourself in the rich history and folklore surrounding dragons, you can gain valuable insights that will inform your artistic choices. Here are a few ways to study dragon lore:
- Read books and mythology about dragons
- Research different cultural interpretations of dragons
- Explore ancient artwork and depictions of dragons
- Learn about the legends and stories featuring dragons
By studying dragon lore, you can discover unique details and traits that will make your dragon drawing more authentic and intriguing.
Exploring Different Dragon Types
Dragons come in various shapes, sizes, and forms in different mythologies. Exploring different dragon types will expand your creativity and allow you to experiment with diverse designs. Here are a few dragon types you can explore:
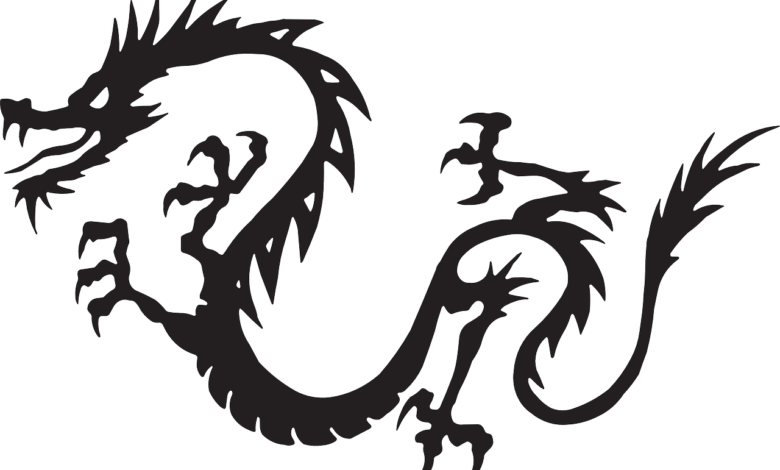
- European Dragons: Known for their large size, wings, and reptilian appearance
- Eastern Dragons: Often depicted as serpentine creatures with long bodies and multiple claws
- Wyverns: Resemble dragons but have only two legs and a pair of wings
- Drakes: Smaller dragons with four legs and no wings
By familiarizing yourself with these different dragon types, you can incorporate their unique characteristics into your drawing and create a dragon that stands out.
Remember, finding your inspiration is not about copying existing designs but rather using them as a starting point to develop your own artistic style. Let your imagination soar as you draw inspiration from dragon lore and explore the vast world of dragon types.
Starting With Basic Shapes
When it comes to drawing a dragon, starting with basic shapes is a great way to build a solid foundation. By breaking down the complex form of a dragon into simple shapes, you can easily establish its proportions and overall structure. In this article, we will explore the process of drawing a dragon by sketching its skeleton, focusing on proportions and angles.
Sketching The Dragon’s Skeleton
Sketching the dragon’s skeleton is the first step in capturing its dynamic pose and movement. Begin by drawing a circle for the dragon’s head. This will serve as a reference point for the rest of the body. Next, add a long oval shape for the body, extending from the head. Remember to keep the lines light and loose, as this is just the initial sketch.
Now, let’s move on to the dragon’s limbs. Draw two lines extending from the body for the front legs, and two lines extending from the back for the hind legs. These lines will help you determine the position and length of the legs. At this stage, don’t worry too much about adding details. Focus on getting the proportions and angles right.
Proportions And Angles
Proportions and angles play a crucial role in creating a realistic and visually appealing dragon drawing. To ensure accuracy, pay attention to the length of each body part in relation to the others. For example, the dragon’s neck should be proportionate to its body, and the length of the legs should be appropriate for the size of the dragon.
When it comes to angles, observe the direction in which the limbs bend and the position of the dragon’s head. These angles will contribute to the sense of movement and add dynamism to your drawing. Keep in mind that dragons are often depicted with strong, muscular bodies and powerful limbs, so emphasize these characteristics in your sketch.
As you progress, refine the shapes and add more details to your dragon drawing. Remember to keep your lines light and build up gradually. Pay attention to the placement of the dragon’s features such as the eyes, mouth, and scales. These details will bring your dragon to life.
In conclusion, starting with basic shapes is an effective approach when drawing a dragon. Sketching the dragon’s skeleton helps establish proportions and angles, setting the foundation for a realistic and dynamic representation. By paying attention to details and gradually refining your sketch, you’ll be able to create an impressive dragon drawing that captures the essence of this mythical creature.
Detailing The Dragon’s Anatomy
When it comes to drawing a dragon, detailing its anatomy is crucial to creating a realistic and captivating depiction. From the head and facial features to the intricate scales, claws, and tail dynamics, each element plays a pivotal role in bringing this mythical creature to life on paper. Let’s delve into the fascinating world of detailing the dragon’s anatomy!
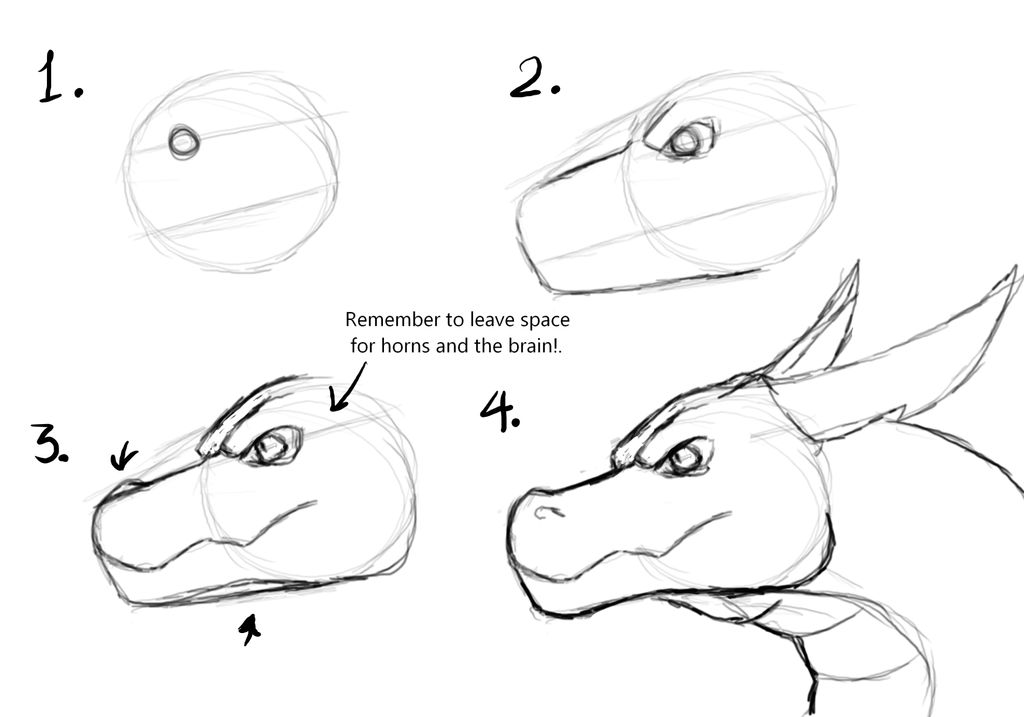
Head And Facial Features
Start by sketching the dragon’s head, focusing on the placement of its eyes, nostrils, and distinct facial structure. Emphasize the sharp, pointed horns and the powerful jawline, capturing the essence of strength and ferocity in the creature’s expression.
Scales, Claws, And Tail Dynamics
Next, move on to the body, where the intricate scales come into play. Highlight the overlapping pattern of the scales, creating a sense of depth and texture. Pay attention to the claws, ensuring they are sharp and menacing, adding to the dragon’s formidable nature. Finally, master the fluidity of the tail, incorporating dynamic movements that convey the creature’s agility and power.
Creating Dynamic Poses
When it comes to drawing dragons, creating dynamic poses is key to bringing these majestic creatures to life on the page. Dynamic poses add movement, energy, and excitement to your artwork, making your dragons appear more realistic and captivating. In this section, we will explore techniques for drawing action poses for dragons and ensuring anatomical consistency.
Action Poses For Dragons
When drawing dragons in action poses, it’s important to consider their unique features and abilities. Dragons are known for their strength, agility, and ability to fly, so incorporating these elements into your poses will make them more engaging. To achieve dynamic action poses:
- Start by visualizing the movement or action you want your dragon to portray. Is it flying, breathing fire, or engaged in combat? This will help you determine the pose that best captures the desired action.
- Use bold lines and exaggerated proportions to emphasize the dragon’s power and intensity. Dragons have muscular bodies, strong wings, and sharp claws, so make sure to highlight these features in your drawing.
- Experiment with different angles and perspectives to add depth and dimension to your artwork. Drawing a dragon in mid-flight or in a dynamic combat stance can make the pose more interesting and visually appealing.
- Consider the dragon’s environment when creating action poses. Is it soaring through the sky, perched on a mountaintop, or crawling through a dense forest? Incorporating elements of the surroundings can enhance the overall composition.
Ensuring Anatomical Consistency
For your dragon drawings to look believable, it’s essential to maintain anatomical consistency. Even though dragons are mythical creatures, adhering to certain rules of anatomy will make your artwork more credible. Here are some tips to ensure anatomical consistency:
- Study real-life animals such as birds, lizards, and dinosaurs. Understanding their skeletal structure, muscle placement, and movement patterns can serve as a foundation for drawing realistic dragon anatomy.
- Pay attention to the proportion and placement of body parts. Dragons typically have a long neck, a muscular torso, and powerful limbs. Ensure that these elements are in proportion to create a visually balanced and harmonious composition.
- Use references and sketches to guide your drawing process. Observing how other artists depict dragons and studying their techniques can provide valuable insights into maintaining anatomical consistency.
- Remember to incorporate details that make sense anatomically. Wings should have enough surface area to support flight, and limbs should have sufficient strength for the dragon’s size and weight.
By following these guidelines for creating dynamic poses and ensuring anatomical consistency, you can take your dragon drawings to the next level. Practice, experimentation, and observation will help you refine your skills and develop your unique artistic style. So, grab your sketchbook and let your imagination soar as you bring these magnificent creatures to life!
Mastering Dragon Wings
Mastering dragon wings is a crucial aspect of bringing these mythical creatures to life on paper. The intricate details and majestic nature of dragon wings can be both challenging and rewarding to capture. In this guide, we’ll delve into the art of mastering dragon wings, focusing on the structure, movement, and texture that make these appendages so captivating.
Structure Of Wings
Understanding the anatomy and structure of dragon wings is essential for creating a realistic portrayal. The primary components of dragon wings include the humerus, ulna, and radius, which are similar to the bones found in avian wings. These bones provide the framework for the wing membrane, which is often depicted as a web of delicate skin. The size and shape of the wings can vary widely, influencing the dragon’s flight capabilities and overall appearance.
Depicting Movement And Texture
Bringing movement and texture to dragon wings adds depth and dynamism to your artwork. Capturing the dynamic motion of dragon wings can be achieved through the use of curved lines and varying wing positions. Additionally, incorporating details such as scales, veins, and translucent membranes can enhance the realism of the wings, making them appear lifelike and ethereal.
Adding Fire And Effects
Breath Of Fire Technique
Imagine the dragon’s breath as a blazing fireball.
Creating Realistic Smoke And Embers
Add layers of smoke and glowing embers for depth.
Finalizing Your Dragon Art
When it comes to finalizing your dragon art, the last steps are crucial in bringing your creation to life. The inking and outlining phase will define the details, while the coloring techniques will add vibrancy and depth to your artwork.
Inking And Outlining
Using fine pens or markers, carefully trace over your pencil sketch to create clean, bold lines. Outline the main features of the dragon, emphasizing scales, wings, and facial details.
Coloring Techniques
Experiment with different coloring mediums such as colored pencils, markers, or digital tools. Start by blocking in base colors and gradually layering shades to create dimension. Don’t forget to blend and shade for a realistic effect.
Tips And Tricks
Tips and Tricks:
Using References
Refer to images or objects for inspiration.
Practicing Shading And Lighting
Enhance your drawing by mastering shading techniques.
Showcasing Your Artwork
When it comes to displaying your artwork, there are various options available to help you showcase your creativity. From digital presentations to physical display choices, how you present your art can greatly impact how it is perceived by others.
Digital Presentation
Utilize digital platforms to share your art with a global audience. Create an online portfolio showcasing your best pieces. Share your work on social media platforms to reach a wider audience. Consider creating digital prints of your artwork for sale.
Physical Display Options
Explore physical display options to exhibit your art in galleries or art shows. Consider framing your artwork to enhance its presentation. Use easels or display stands for smaller pieces. Leverage wall space for larger artworks.
Credit: www.deviantart.com
Frequently Asked Questions
How To Draw A Simple Cartoon Character?
To draw a simple cartoon character, start with basic shapes and add details gradually. Use simple lines and curves to form the body and facial features. Add personality with expressive eyes and a unique pose.
What Are The Essential Drawing Tools For Beginners?
Beginners can start with basic drawing tools like pencils, erasers, and paper. As skills develop, consider adding fine liners, markers, and a drawing tablet. Experiment with different tools to find what works best for your style.
How Can I Improve My Drawing Skills?
To improve drawing skills, practice regularly and study different techniques. Seek inspiration from nature, art, and everyday objects. Experiment with different mediums and styles to develop a unique and versatile approach to drawing.
Conclusion
To sum up, drawing a requires practice, patience, and creativity. Follow these steps to master the art. Remember to enjoy the process and let your imagination flow freely. With dedication and a positive mindset, you can bring your artistic vision to life on paper.
Keep drawing and expressing yourself!